With an impressive name as always Autodesk introduces a new real time rendering engine. You can see all the features this new software has here:
http://www.autodesk.com/products/stingray/overview
There is also an improved workflow between Revit and 3ds Max.
Sales start at the end of August. Can't wait it to give it a try.
Εμφάνιση αναρτήσεων με ετικέτα Revit. Εμφάνιση όλων των αναρτήσεων
Εμφάνιση αναρτήσεων με ετικέτα Revit. Εμφάνιση όλων των αναρτήσεων
Δευτέρα 10 Αυγούστου 2015


Δευτέρα 29 Ιουνίου 2015



Τρίτη 26 Μαΐου 2015
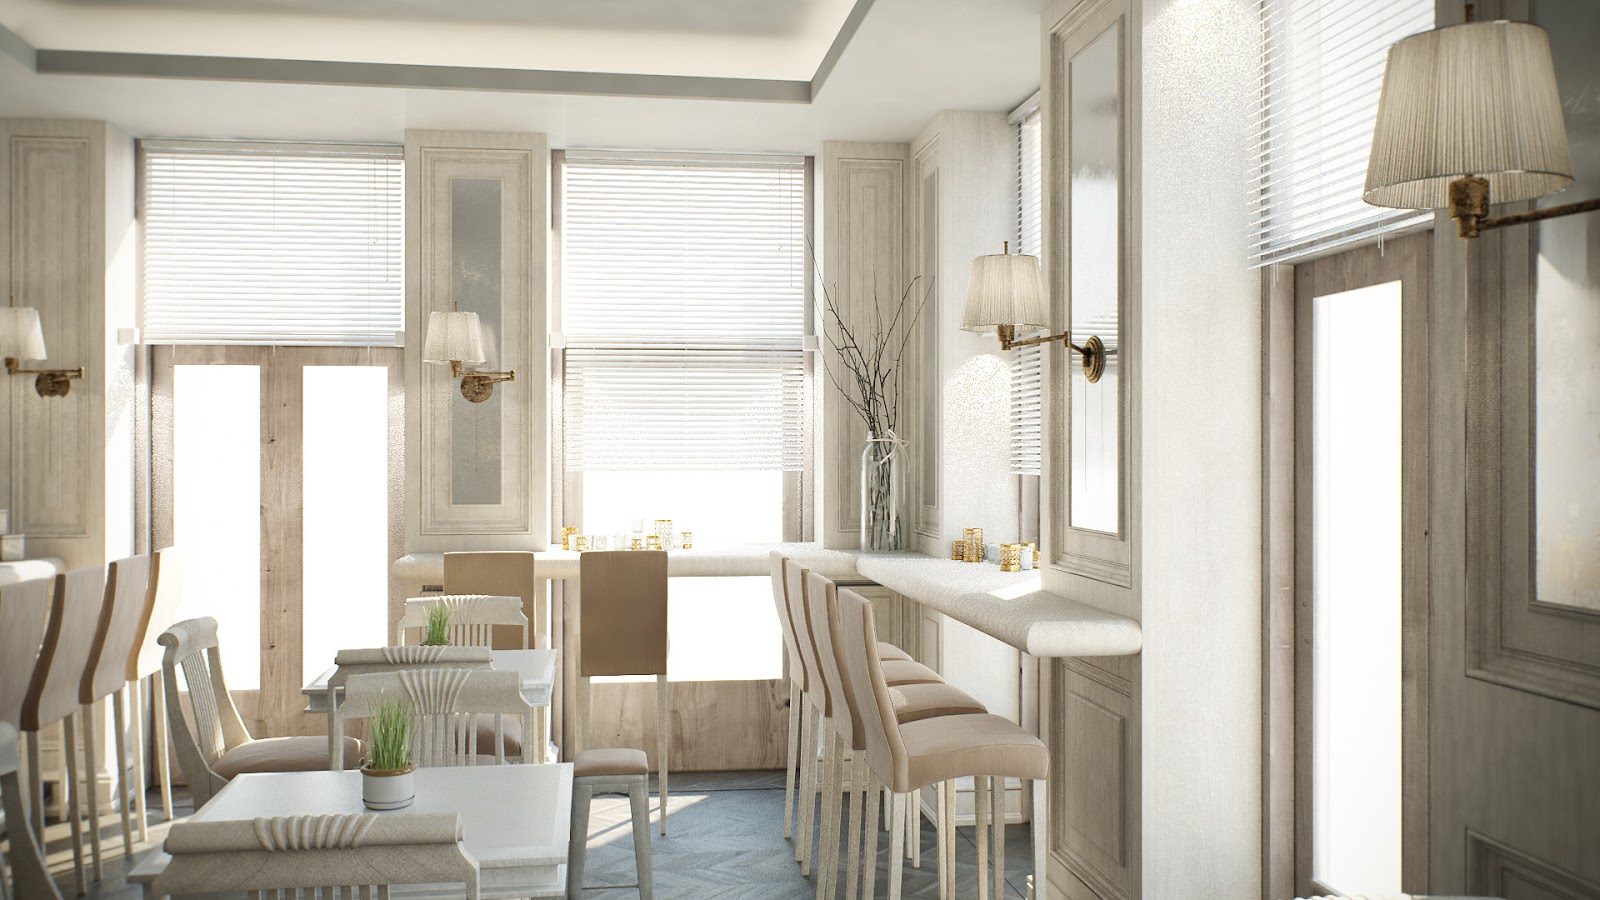
Olympic Equestrian Venue
Usual workflow, modelled in Revit, clash detection in Navisworks and rendered in 3ds Max.



Δευτέρα 13 Απριλίου 2015
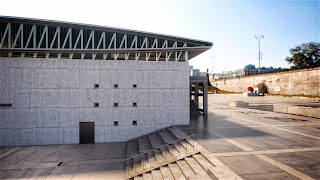
Revit 2016 new features
Revit 2016 is out and Autodesk has no major improvements when comparing to the Revit 2015 R2 version of the software. The performance and stability are improved though.
Lets see a couple of the new features:
Lets see a couple of the new features:
- Automatic section box: You can select one or more elements and adjust the section box around them with just one click.
- New Rendering algorithm: There is one more rendering algorithm added next to NVidia mental ray named Autodesk Raytracer.
- Schedule improvements: Easy to change, delete or add a column from the ribbon and more.
- Revisions improvements: Can start from zero (0). Improved naming system. Can be deleted.
- Browser Organization: Easy to switch between setups from the properties tab.
- Autodesk seek quick search
- Load as Group: It loads the current project into another open project as group.
Τετάρτη 11 Μαρτίου 2015
Bioclimatic Housing
Two bioclimatic family houses in the Attica region with zero energy consumption. Autodesk Energy and Lighting Analysis software was used during the study.
Δύο ανεξάρτητες δυόροφες βιοκλιματικές κατοικίες με πλήρη ενεργειακή αυτονομία. Για την μελέτη χρησιμοποιήθηκε το λογισμικό Energy και Lighting Analysis της Autodesk.
.jpg)
.jpg)
.jpg)
.jpg)
Δύο ανεξάρτητες δυόροφες βιοκλιματικές κατοικίες με πλήρη ενεργειακή αυτονομία. Για την μελέτη χρησιμοποιήθηκε το λογισμικό Energy και Lighting Analysis της Autodesk.
Δευτέρα 9 Φεβρουαρίου 2015
New JUMBO Supermarket in Tripoli Arcadia
This is the new Jumbo retail store outside Tripoli Arcadia. All disciplines were modeled in Revit, clash detection in Navisworks, renderings in 3DS max with no post production.

.jpg)
.jpg)


Παρασκευή 30 Ιανουαρίου 2015
.jpg)
.jpg)
.jpg)
.jpg)
.jpg)
.jpg)
.jpg)
.jpg)
Τετάρτη 17 Δεκεμβρίου 2014
Autodesk Skyscraper
Along with Autodesk 360, Revit Server, Vault and Buzzsaw, Autodesk will be presenting a new cloud based technology that will be integrated into A360. Project Skyscraper will help the collaboration between multidisciplinary companies with multiple locations. The technology is under development and is expected to debut sometime in 2015. Skyscraper will eventually be the default collaboration platform in the Revit world.
Μαζί με τα Autodesk 360, Revit Server, Vault και Buzzsaw, η Autodesk θα παρουσιάσει μια καινούρια τεχνολογία τοποθετημένη μέσα στο A360. Η δοκιμαστική έκδοση ονομάζεται project skyscraper και θα καλύπτει τις ανάγκες επικοινωνίας μεταξύ των μελετητικών γραφείων μέσω διαδικτύου. Η τεχνολογία είναι υπό εξέλιξη και θα ολοκληρωθεί μέσα στο 2015 και θα είναι η τελική πλατφόρμα επικοινωνίας για όλους τους χρήστες Revit.
Μαζί με τα Autodesk 360, Revit Server, Vault και Buzzsaw, η Autodesk θα παρουσιάσει μια καινούρια τεχνολογία τοποθετημένη μέσα στο A360. Η δοκιμαστική έκδοση ονομάζεται project skyscraper και θα καλύπτει τις ανάγκες επικοινωνίας μεταξύ των μελετητικών γραφείων μέσω διαδικτύου. Η τεχνολογία είναι υπό εξέλιξη και θα ολοκληρωθεί μέσα στο 2015 και θα είναι η τελική πλατφόρμα επικοινωνίας για όλους τους χρήστες Revit.
Δευτέρα 10 Νοεμβρίου 2014
HP Z Turbo Drive
We all know by now that we need a solid state disk drive to increase response times of various software that use the hard disk frequently. HP recently released an add-in PCI Express card with an impressive name and performance. It boasts two and a half times the read/write times of a standard solid state disk. More info here.

Γνωρίζουμε όλοι ότι οι solid state δίσκοι βελτιώνουν τις ταχύτητες λειτουργίας διάφορων προγραμμάτων τα οποία απαιτούν συχνή χρήση του σκληρού δίσκου. Πρόσφατα η HP παρουσίασε μια πρόσθετη κάρτα PCI Express με εντυπωσιακό όνομα και επιδόσεις. Βελτιώνει την ταχύτητα εγγραφής από και προς τον σκληρό δίσκο περίπου 2,5 φορές σε σχέση με έναν απλό SSD. Περισσότερες πληροφορίες εδώ.
Γνωρίζουμε όλοι ότι οι solid state δίσκοι βελτιώνουν τις ταχύτητες λειτουργίας διάφορων προγραμμάτων τα οποία απαιτούν συχνή χρήση του σκληρού δίσκου. Πρόσφατα η HP παρουσίασε μια πρόσθετη κάρτα PCI Express με εντυπωσιακό όνομα και επιδόσεις. Βελτιώνει την ταχύτητα εγγραφής από και προς τον σκληρό δίσκο περίπου 2,5 φορές σε σχέση με έναν απλό SSD. Περισσότερες πληροφορίες εδώ.
Τρίτη 7 Οκτωβρίου 2014
Autodesk Revit 2015 R2
The half year version has arrived available for those on subscription. We get numerous improvements and three until now external applications are now embedded into the software installation. That is Dynamo, the Roombook-Areabook-Buildingbook trio, and Site Designer. All the new features are listed here.
Κυκλοφόρησε η ενδιάμεση έκδοση του Revit 2015 R2 και είναι διαθέσιμη για όσους έχουν subsription. Έχει πολλές μικρές βελτιώσεις αλλά και ενσωματωμένες πλέον τρεις νέες εφαρμογές. Αυτές είναι το Dynamo, η τριάδα Roombook-Areabook-Buildingbook, και το Site Designer. Λίστα με τις νέες δυνατότητες βρίσκει κανείς εδώ.
Κυκλοφόρησε η ενδιάμεση έκδοση του Revit 2015 R2 και είναι διαθέσιμη για όσους έχουν subsription. Έχει πολλές μικρές βελτιώσεις αλλά και ενσωματωμένες πλέον τρεις νέες εφαρμογές. Αυτές είναι το Dynamo, η τριάδα Roombook-Areabook-Buildingbook, και το Site Designer. Λίστα με τις νέες δυνατότητες βρίσκει κανείς εδώ.
Πέμπτη 3 Ιουλίου 2014
Revit Τags
Ένα από τα πιο χρήσιμα εργαλεία στο Revit είναι τα Tags. Σχεδόν όλα τα αντικείμενα δέχονται tags: έπιπλα, χώροι, όρια οικοπέδου, ακόμα και δισδιάστατα αντικείμενα λεπτομερειών. Δυστυχώς όμως υπάρχουν και εξαιρέσεις που απαιτούν διαφορετικούς τρόπους αντιμετώπισης.
1. Displaced elements
Για να βάλουμε Tags σε τρισδιάστατη όψη πρέπει πρώτα να την κλειδώσουμε χρησιμοποιώντας την εντολή save orientation and lock view. Στην περίπτωση όμως που τα αντικείμενα έχουν γίνει displaced πρέπει αρχικά να χρησιμοποιήσουμε την εντολή Tag all και μετά να μετακινήσουμε τα tags στις σωστές θέσεις.
2. Δημιουργία υπομνήματος συμβολισμών
Θέλουμε να δημιουργήσουμε ένα Legend το οποίο να περιγράφει τα χρησιμοποιούμενα σύμβολα. Για να τοποθετήσουμε Tags πηγαίνουμε στον Project Browser, Families, Annotation Symbols, επιλέγουμε το Tag family και το τοποθετούμε στο Legend με drag n drop. To Tag δεν θα έχει παραμέτρους καθώς δεν θα είναι συνδεδεμένο με κάποιο αντικείμενο. Για να αλλάξουμε τις τιμές που εμφανίζει, κάνουμε edit στο family, και στο label όπου αλλάζουμε τα sample values. Μετά με reload στο project οι τιμές στο Legend θα τροποποιηθούν αντίστοιχα με τις τιμές που δώσαμε ως sample values.
3. Δημιουργία Tags σε Legend Components
Ακόμη και στην έκδοση 2015 η τοποθέτηση Tags σε Legend components δεν είναι δυνατή. Η λύση σε αυτή την περίπτωση είναι η δημιουργία μιας νέας φάσης στην οποία θα τοποθετηθούν τα αντικείμενα που θέλουμε να παρουσιάσουμε.
Revit Tag workarounds
Tagging is one of the most powerful tools in Revit. You can
create tags on almost everything from property lines to casework which draw
information from the elements to the tag. You can even tag detail items but
unfortunately there are elements you are not allowed to tag. Let’s take a look
on some workarounds we are using to get over this situation.
1st problem: Tagging displaced elements.
You can tag elements in a 3d view once you got it locked. To
do this use the command save orientation and lock view. Then
you can tag freely everything except displaced elements! Doh! The simple
solution to this is to use the Tag all command which will tag even
displaced elements and then rearrange the positions of the created tags. Easy.
2nd problem: Creating a graphic tag symbol
legend.
On a new legend you want to create a list of the tagging
symbols used in the project. Unfortunately you cannot put any of the existing
tag symbols into the Legend with any of the Ribbon commands. To counter this go
to the Project Browser tree, Families, Annotation Symbols, select any of the
existing Tag family and drag n drop it to the Legend. It will appear in its
default form because it will not be linked to an element. In order to change
the default values shown, edit the Tag family, then edit the label and change
the sample value for each label parameter. Then reload the Tag family to the
project and the Legend will update with the new sample values.
3rd problem: Tagging legend components.
Unfortunately even in Revit 2015 users are unable to
directly tag Legend components. The workaround for this is the creation of a
previous phase and remodeling all the elements we want to tag in this phase.
Autodesk should soon deal with this deficiency.
Τρίτη 1 Απριλίου 2014
Revit 2015
Κυκλοφόρησε η καινούρια έκδοση του Revit 2015 η οποία θα είναι σε λίγο καιρό διαθέσιμη και στην ιστοσελίδα της Autodesk. Ανάμεσα στα νέα χαρακτηριστικά ξεχωρίζουμε το multiple trim με crossing window, τον δεσμό με ifc αρχείο, τις βελτιωμένες προμετρήσεις-φίλτρα βάσει base και top constrain και την αλλαγή (επιτέλους) του κειμένου grand totals! Αναλυτικά τα νέα χαρακτηριστικά τα βλέπετε εδώ: http://www.autodesk.com/products/autodesk-revit-family/features/software-for-bim/new/gallery-view
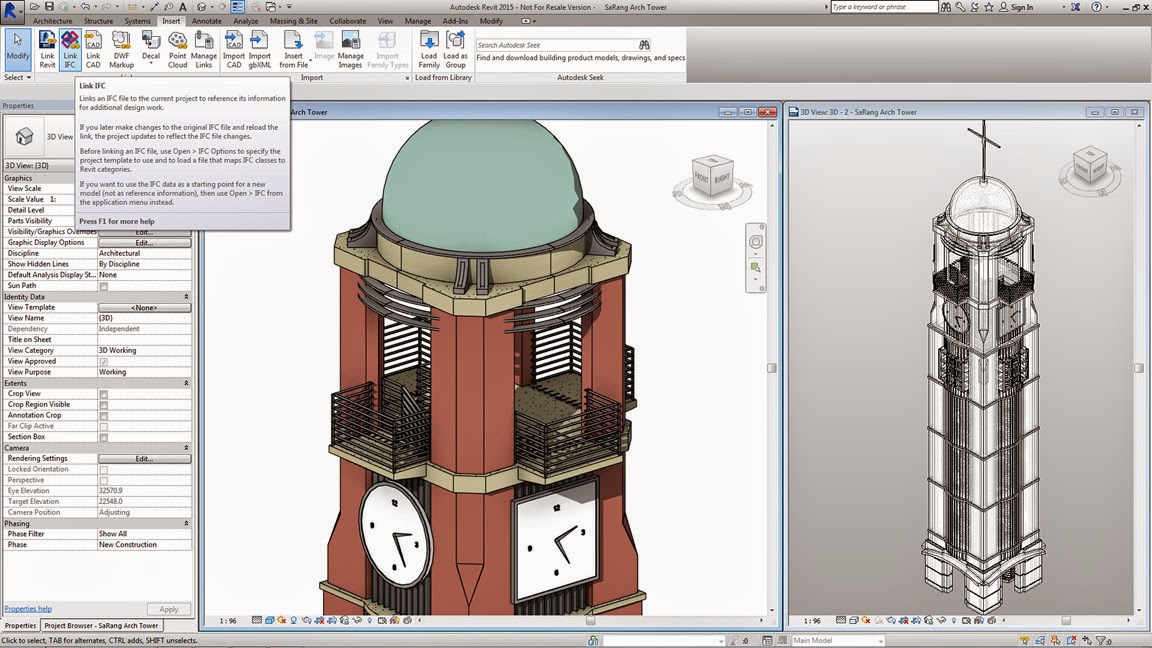
Revit 2015 is out and it will be shortly available on the Autodesk website. Some of the new features are the multiple trim available with crossing window, the ifc link, improved schedule filtering on base and top constrains and (finally) customizable grand totals text! Details for the new features are published here: http://www.autodesk.com/products/autodesk-revit-family/features/software-for-bim/new/gallery-view
Revit 2015 is out and it will be shortly available on the Autodesk website. Some of the new features are the multiple trim available with crossing window, the ifc link, improved schedule filtering on base and top constrains and (finally) customizable grand totals text! Details for the new features are published here: http://www.autodesk.com/products/autodesk-revit-family/features/software-for-bim/new/gallery-view
Τρίτη 11 Μαρτίου 2014
Αναβάθμιση παλαιών αρχείων με τον Revit File Upgrader
Για να μην καθυστερεί κανείς με τις αναβαθμίσεις των παλαιών Revit αρχείων κάθε φορά που ανοίγει ένα από αυτά στην τρέχουσα έκδοση μπορεί να χρησιμοποιήσει τον revit upgrader και να κάνει συνολική αναβάθμιση σε όλα τα rvt αρχεία, στα template files και στα family files. Ο upgrader είναι δωρεάν στην ιστοσελίδα autodesk exchange/apps.

In order not to delay with upgrading one by one existing Revit files to the current version, one can use the revit upgrader and proceed with a batch upgrade of the rvt, template and family files. The upgrader is free on autodesk exchange / apps website.
In order not to delay with upgrading one by one existing Revit files to the current version, one can use the revit upgrader and proceed with a batch upgrade of the rvt, template and family files. The upgrader is free on autodesk exchange / apps website.
Πέμπτη 13 Φεβρουαρίου 2014
Revit shortcuts - συντομεύσεις πληκτρολογίου
Για να διαχειριστούμε τις συντομεύσεις στο Revit πηγαίνουμε στο ribbon-manage-macro security-user interface- keyboard shortcuts- customize...και ορίζουμε αυτά που θέλουμε, εγώ τοποθετώ στο ctrl-2 τον project browser, πάει παρέα με το ctrl-1 του properties.
Παρακάτω παραθέτω κάποια από τα default shortcuts που είναι πολύ χρήσιμα κατά την διάρκεια της σχεδίασης, οι συντομεύσεις δουλεύουν μόνο στα αγγλικά:
TR - Trim, AL - Align, HH - Hide element, HR - Hide restore, HC - Hide category, HI - Isolate element, IC - Isolate category, ZA - Zoom all, ZZ - Zoom window, VV - Visibility graphics, TL - Thin lines, PP - Properties, DI - Aligned dimension, MV - Move, SZ - Close loop, Delete - Delete
In order to manage the Revit shortcuts we go to ribbon-manage-macro security-user interface-keyboard shortcuts-customize ... and define what we want, I posit ctrl-2 for the project browser, which goes alongside with ctrl-1 of properties.
Below I quote some of the default shortcuts that are very useful during the design process:
TR - Trim, AL - Align, HH - Hide element, HR - Hide restore, HC - Hide category, HI - Isolate element, IC - Isolate category, ZA - Zoom all, ZZ - Zoom window, VV - Visibility graphics, TL - Thin lines, PP - Properties, DI - Aligned dimension, MV - Move, SZ - Close loop, Delete - Delete
Παρακάτω παραθέτω κάποια από τα default shortcuts που είναι πολύ χρήσιμα κατά την διάρκεια της σχεδίασης, οι συντομεύσεις δουλεύουν μόνο στα αγγλικά:
TR - Trim, AL - Align, HH - Hide element, HR - Hide restore, HC - Hide category, HI - Isolate element, IC - Isolate category, ZA - Zoom all, ZZ - Zoom window, VV - Visibility graphics, TL - Thin lines, PP - Properties, DI - Aligned dimension, MV - Move, SZ - Close loop, Delete - Delete
In order to manage the Revit shortcuts we go to ribbon-manage-macro security-user interface-keyboard shortcuts-customize ... and define what we want, I posit ctrl-2 for the project browser, which goes alongside with ctrl-1 of properties.
Below I quote some of the default shortcuts that are very useful during the design process:
TR - Trim, AL - Align, HH - Hide element, HR - Hide restore, HC - Hide category, HI - Isolate element, IC - Isolate category, ZA - Zoom all, ZZ - Zoom window, VV - Visibility graphics, TL - Thin lines, PP - Properties, DI - Aligned dimension, MV - Move, SZ - Close loop, Delete - Delete
Πέμπτη 2 Ιανουαρίου 2014
Duplicating views while keeping linework
When duplicating a view in Revit using the duplicate or duplicate with detailing command the newly created view does not keep the linework made to the parent view. In order to copy a view and keep all the detailing and linework made we follow this two step procedure: first select the view you want to copy, right-click select duplicate view and duplicate as a dependent and then select the newly created dependent view, right-click again and select convert to independent view.

Στο Revit όταν θέλουμε να αντιγράψουμε ένα view χρησιμοποιούμε την εντολή duplicate ή duplicate with detailing, και στις δύο περιπτώσεις όμως δεν αντιγράφεται η drafting πληροφορία που έχουμε δημιουργήσει με την εντολή linework. Για να διατηρήσουμε τις αλλαγές που έχουμε κάνει στην εμφάνιση των γραμμών με την linework επιλέγουμε πρώτα το view και με δεξί κλικ κάνουμε duplicate view - duplicate as a dependent και μετά επιλέγουμε το dependent view που δημιουργήθηκε και με δεξί κλικ πάλι επιλέγουμε convert to independent view.

Στο Revit όταν θέλουμε να αντιγράψουμε ένα view χρησιμοποιούμε την εντολή duplicate ή duplicate with detailing, και στις δύο περιπτώσεις όμως δεν αντιγράφεται η drafting πληροφορία που έχουμε δημιουργήσει με την εντολή linework. Για να διατηρήσουμε τις αλλαγές που έχουμε κάνει στην εμφάνιση των γραμμών με την linework επιλέγουμε πρώτα το view και με δεξί κλικ κάνουμε duplicate view - duplicate as a dependent και μετά επιλέγουμε το dependent view που δημιουργήθηκε και με δεξί κλικ πάλι επιλέγουμε convert to independent view.
Κυριακή 15 Δεκεμβρίου 2013
Revit Dynamo
O Zach Kron έχει ξεκινήσει την εξέλιξη του Dynamo το οποίο είναι add on στο Revit και ανταγωνίζεται το δίδυμο Rhino-Grasshopper. Η γλώσσα που χρησιμοποιεί είναι η python και το αποτέλεσμα είναι ένα πολύ φιλικό περιβάλλον εργασίας. Το add on προς το παρόν είναι δωρεάν και μπορεί κανείς να το κατεβάσει και να το δοκιμάσει από το site της autodesk για το vasari:
http://autodeskvasari.com/dynamo
Αφου γίνει η εγκατάσταση το Dynamo βρίσκεται σto ribbon του Revit στη θέση Add-Ins:

στο youtube έχουν ανέβει ήδη πολλά tutorials και δοκιμές εφαρμογής του Dynamo.
http://www.youtube.com/watch?v=kRgmHaU4Q40
Zach Kron has started the development of Dynamo which is a Revit add on software and competes the Rhino-Grasshopper dynamic duo. The language used is python and the result is a user friendly interface. The code is free for now and you can download it from the autodesk vasari site:
http://autodeskvasari.com/dynamo
After installing you can find Dynamo in the Revit ribbon Add-Ins:
there are many tutorials and tests already uploaded on youtube .
http://www.youtube.com/watch?v=kRgmHaU4Q40
http://autodeskvasari.com/dynamo
Αφου γίνει η εγκατάσταση το Dynamo βρίσκεται σto ribbon του Revit στη θέση Add-Ins:

στο youtube έχουν ανέβει ήδη πολλά tutorials και δοκιμές εφαρμογής του Dynamo.
http://www.youtube.com/watch?v=kRgmHaU4Q40
Zach Kron has started the development of Dynamo which is a Revit add on software and competes the Rhino-Grasshopper dynamic duo. The language used is python and the result is a user friendly interface. The code is free for now and you can download it from the autodesk vasari site:
http://autodeskvasari.com/dynamo
After installing you can find Dynamo in the Revit ribbon Add-Ins:
there are many tutorials and tests already uploaded on youtube .
http://www.youtube.com/watch?v=kRgmHaU4Q40
Πέμπτη 3 Οκτωβρίου 2013
Line is slightly off axis and may cause inaccuracies.
Πολλές φορές στο Revit εμφανίζεται αυτό το μήνυμα: Line is slightly off axis and may cause inaccuracies. που συνοδεύεται από τον χαρακτηριστικό ήχο σφάλματος του προγράμματος. Τι ακριβώς σημαίνει; Ουσιαστικά το πρόγραμμα μας προειδοποιεί οτι η γραμμή ή ο τοίχος ή το στοιχείο που δημιουργήσαμε εμφανίζεται στην οθόνη μας ακριβώς ως οριζόντιο ή κάθετο ή κεκλιμένο 45 μοίρες αλλά στην πραγματικότητα δεν είναι!
Για να κατανοήσουμε το παραπάνω φτιάχνουμε μια Model line με μήκος 50mm και την αντιγράφουμε με το copy σε μήκος 100mm παράλληλα στον αρχικό άξονα σχεδίασης. Στη συνέχεια μετακινούμε την μία εκ των δύο κατά 0.1mm αυτή τη φορά κάθετα στον άξονα σχεδίασης των γραμμών. Προσπαθώντας τώρα να τις συνδέσουμε με μια τρίτη Model line για να δημιουργήσουμε ουσιαστικά μια ευθεία από τρεις model lines (πατώντας και το tab για να βρούμε τα άκρα τους) η προειδοποίηση θα εμφανιστεί γιατί η τρίτη γραμμή που δημιουργήθηκε εμφανίζεται παράλληλη σε σχεση με τις άλλες δυο αλλά δεν είναι, έχει μια μικρή κλίση.
Το μήνυμα αυτό το συναντάμε συχνά όταν εισάγουμε ένα dwg αρχείο και χρησιμοποιούμε το pick lines εργαλείο του Revit. Αυτό συμβαίνει γιατί όντως δεν έχουν σχεδιαστεί σωστά οι γραμμές στο dwg π.χ με ortho ή γιατί κατά την εισαγωγή του αρχείου υπήρξαν λάθη στις ακρίβειες μεταξύ των προγραμμάτων. Για αυτόν ακριβώς τον λόγο πρέπει να έχουμε πάντα τσεκαρισμένη την επιλογή correct lines that are slightly off axis που εμφανίζεται κατά το import.
Στην περίπτωση τώρα που όντως θέλουμε το στοιχείο που σχεδιάζουμε να έχει πολύ μικρή κλίση μπορούμε να συνεχίσουμε αδιαφορώντας για το μήνυμα, σε αντίθετη περίπτωση πρέπει να το διαγράψουμε και να το ξανασχεδιάσουμε έτσι ώστε να είναι πραγματικά κάθετο ή οριζόντιο ή στις 45 μοίρες.
Many times in Revit this message appears : Line is slightly off axis and may cause inaccuracies. accompanied by a beep error sound. What exactly does it mean? Basically our software warns that the line or the wall or the item we created appears on the screen exactly as horizontal or vertical or 45 degrees inclined but in reality it is not!
To understand the above we draw a 50mm long Model line and then copy it 100mm parallel to the line axis. Then move 0.1mm one of the two this time vertical to the line drawing axis. When trying to connect these two with a third Model line (by pressing the tab to find the endpoints) the warning will appear because the third line created appears parallel in relation to the other two but it is not, is has a slight slope.
The above message is often encountered when importing a dwg file and using the pick line tool. This happens because the dwg drawing was not properly designed (eg with ortho on) or because there were errors during the import between the programs. For this reason we must have the correct lines that are slightly off axis option always checked during dwg import.
If we actually want the item we are drawing to have a very slight incline we can ignore the message, otherwise we have to delete and re-design it so that it is truly vertical or horizontal or at 45 degrees.
Για να κατανοήσουμε το παραπάνω φτιάχνουμε μια Model line με μήκος 50mm και την αντιγράφουμε με το copy σε μήκος 100mm παράλληλα στον αρχικό άξονα σχεδίασης. Στη συνέχεια μετακινούμε την μία εκ των δύο κατά 0.1mm αυτή τη φορά κάθετα στον άξονα σχεδίασης των γραμμών. Προσπαθώντας τώρα να τις συνδέσουμε με μια τρίτη Model line για να δημιουργήσουμε ουσιαστικά μια ευθεία από τρεις model lines (πατώντας και το tab για να βρούμε τα άκρα τους) η προειδοποίηση θα εμφανιστεί γιατί η τρίτη γραμμή που δημιουργήθηκε εμφανίζεται παράλληλη σε σχεση με τις άλλες δυο αλλά δεν είναι, έχει μια μικρή κλίση.
Το μήνυμα αυτό το συναντάμε συχνά όταν εισάγουμε ένα dwg αρχείο και χρησιμοποιούμε το pick lines εργαλείο του Revit. Αυτό συμβαίνει γιατί όντως δεν έχουν σχεδιαστεί σωστά οι γραμμές στο dwg π.χ με ortho ή γιατί κατά την εισαγωγή του αρχείου υπήρξαν λάθη στις ακρίβειες μεταξύ των προγραμμάτων. Για αυτόν ακριβώς τον λόγο πρέπει να έχουμε πάντα τσεκαρισμένη την επιλογή correct lines that are slightly off axis που εμφανίζεται κατά το import.
Στην περίπτωση τώρα που όντως θέλουμε το στοιχείο που σχεδιάζουμε να έχει πολύ μικρή κλίση μπορούμε να συνεχίσουμε αδιαφορώντας για το μήνυμα, σε αντίθετη περίπτωση πρέπει να το διαγράψουμε και να το ξανασχεδιάσουμε έτσι ώστε να είναι πραγματικά κάθετο ή οριζόντιο ή στις 45 μοίρες.
Many times in Revit this message appears : Line is slightly off axis and may cause inaccuracies. accompanied by a beep error sound. What exactly does it mean? Basically our software warns that the line or the wall or the item we created appears on the screen exactly as horizontal or vertical or 45 degrees inclined but in reality it is not!
To understand the above we draw a 50mm long Model line and then copy it 100mm parallel to the line axis. Then move 0.1mm one of the two this time vertical to the line drawing axis. When trying to connect these two with a third Model line (by pressing the tab to find the endpoints) the warning will appear because the third line created appears parallel in relation to the other two but it is not, is has a slight slope.
The above message is often encountered when importing a dwg file and using the pick line tool. This happens because the dwg drawing was not properly designed (eg with ortho on) or because there were errors during the import between the programs. For this reason we must have the correct lines that are slightly off axis option always checked during dwg import.
If we actually want the item we are drawing to have a very slight incline we can ignore the message, otherwise we have to delete and re-design it so that it is truly vertical or horizontal or at 45 degrees.
Παρασκευή 12 Ιουλίου 2013
Μαθήματα Revit σε μορφή video. - Revit lessons at youtube
Ξεκινάμε μια σειρά μαθημάτων-σεμιναρίων-τεχνικών με το Revit σε μορφή video με περιγραφή στα ελληνικά που θα δημοσιεύονται στο youtube με εβδομαδιαία συχνότητα. Έχουν ήδη αναρτηθεί:
We have started a new series of Revit lessons-tips n tricks-techniques captured in video format with Greek language narration that will be uploaded on youtube weekly. Already playing:
Μαθήματα Revit (1) Wall and structural column cleanup priority
Μαθήματα Revit (2) Structural column furring best practice
Μαθήματα Revit (3) Revit 2014 displace elements features
Μαθήματα Revit (4) Revit design options
Η συνέχεια εδώ...
http://revit-2014.blogspot.gr/
We have started a new series of Revit lessons-tips n tricks-techniques captured in video format with Greek language narration that will be uploaded on youtube weekly. Already playing:
Μαθήματα Revit (1) Wall and structural column cleanup priority
Μαθήματα Revit (2) Structural column furring best practice
Μαθήματα Revit (3) Revit 2014 displace elements features
Μαθήματα Revit (4) Revit design options
Η συνέχεια εδώ...
http://revit-2014.blogspot.gr/
Παρασκευή 3 Μαΐου 2013
Παραμετροποίηση και κατηγοριοποίηση των views στο Revit. - Giving view parameters and organize Revit views.
Ξεκινώντας ένα project στο Revit τα views είναι ταξινομημένα σε levels και διαχωρίζονται σε κατόψεις, ανόψεις, όψεις, τομές, τρισδιάστατες όψεις. Τα views φέρουν αυτόματα και άλλες παραμέτρους όπως phase, discipline κλπ και μπορούν να ταξινομηθούν και βάσει αυτών από τον project browser. Τι κάνουμε όμως όταν θέλουμε να δώσουμε δικές μας παραμέτρους στα views και να τα ταξινομήσουμε βάσει αυτών; Η διαδικασία περιλαμβάνει δύο απλά βήματα.
Βήμα πρώτο, πάμε στο ribbon-manage-project parameters-add και δημιουργούμε μια καινούρια παράμετρο συμπληρώνοντας τα παρακάτω:

Η καινούρια παράμετρος την οποία ονομάσαμε κατηγορία σχεδίων εμφανίζεται πλέον σε κάθε view στην ομάδα Indentity Data και φυσικά και στις προμετρήσεις των views. Μπορούμε τώρα να δώσουμε σε κάθε view την "κατηγορία σχεδίου" που θέλουμε και να ταξινομήσουμε βάσει αυτής.
Το δεύτερο βήμα είναι η ταξινόμηση βάσει της νέας κατηγορίας που δημιουργήσαμε, πάμε στον project browser-views(all)-δεξί κλικ type properties-type: type/discipline-duplicate και δίνουμε το όνομα που θέλουμε π.χ ταξινόμηση βάσει κατηγορίας. Στο folders πατάμε edit-groupby-κατηγορία σχεδίου-ΟΚ-ΟΚ και η νέα ταξινόμηση είναι έτοιμη.
When starting a new project in Revit all the views are organized to levels for floor plans, ceiling plans, elevations, sections, 3d views. All the views carry also more parameters such as phase, discipline, etc and can be organized according to these from the project browser. But what do we do when we want to assign are own parameters to each view and organize them accordingly? The procedure includes two easy steps.
Step one, go to the ribbon-manage-project parameters-add and create a new parameter as seen below:

The newly created parameter that was named View category is now displayed on each view under the Identity data group of parameters and of course to the view list schedules. We can now fill the view category parameter for each view and organize the project on this parameter.
The second step is the classification based on the new categories that we created, for this lets go to project browser-views(all)-right click-type properties-type: type/discipline-duplicate and name the new classification as we please, for example "Category based" Then we go to folders-edit-groupby-view category-OK-OK and the new organization is ready.
Βήμα πρώτο, πάμε στο ribbon-manage-project parameters-add και δημιουργούμε μια καινούρια παράμετρο συμπληρώνοντας τα παρακάτω:

Η καινούρια παράμετρος την οποία ονομάσαμε κατηγορία σχεδίων εμφανίζεται πλέον σε κάθε view στην ομάδα Indentity Data και φυσικά και στις προμετρήσεις των views. Μπορούμε τώρα να δώσουμε σε κάθε view την "κατηγορία σχεδίου" που θέλουμε και να ταξινομήσουμε βάσει αυτής.
Το δεύτερο βήμα είναι η ταξινόμηση βάσει της νέας κατηγορίας που δημιουργήσαμε, πάμε στον project browser-views(all)-δεξί κλικ type properties-type: type/discipline-duplicate και δίνουμε το όνομα που θέλουμε π.χ ταξινόμηση βάσει κατηγορίας. Στο folders πατάμε edit-groupby-κατηγορία σχεδίου-ΟΚ-ΟΚ και η νέα ταξινόμηση είναι έτοιμη.
When starting a new project in Revit all the views are organized to levels for floor plans, ceiling plans, elevations, sections, 3d views. All the views carry also more parameters such as phase, discipline, etc and can be organized according to these from the project browser. But what do we do when we want to assign are own parameters to each view and organize them accordingly? The procedure includes two easy steps.
Step one, go to the ribbon-manage-project parameters-add and create a new parameter as seen below:

The newly created parameter that was named View category is now displayed on each view under the Identity data group of parameters and of course to the view list schedules. We can now fill the view category parameter for each view and organize the project on this parameter.
The second step is the classification based on the new categories that we created, for this lets go to project browser-views(all)-right click-type properties-type: type/discipline-duplicate and name the new classification as we please, for example "Category based" Then we go to folders-edit-groupby-view category-OK-OK and the new organization is ready.
Παρασκευή 19 Απριλίου 2013
Revit gusset plates
Αναμένοντας τα βελτιωμένα gusset plates του Revit 2014 ας δούμε τι μπορείς να κάνεις στο 2013...


Εγγραφή σε:
Αναρτήσεις (Atom)